
Step-by-Step Installation Guide for Piggyback Adapters in Automotive Wiring
May 14,2026
Summary:
Step-by-Step Installation Guide for Piggyback Adapters in Automotive Wiring
Understanding Piggyback Adapters
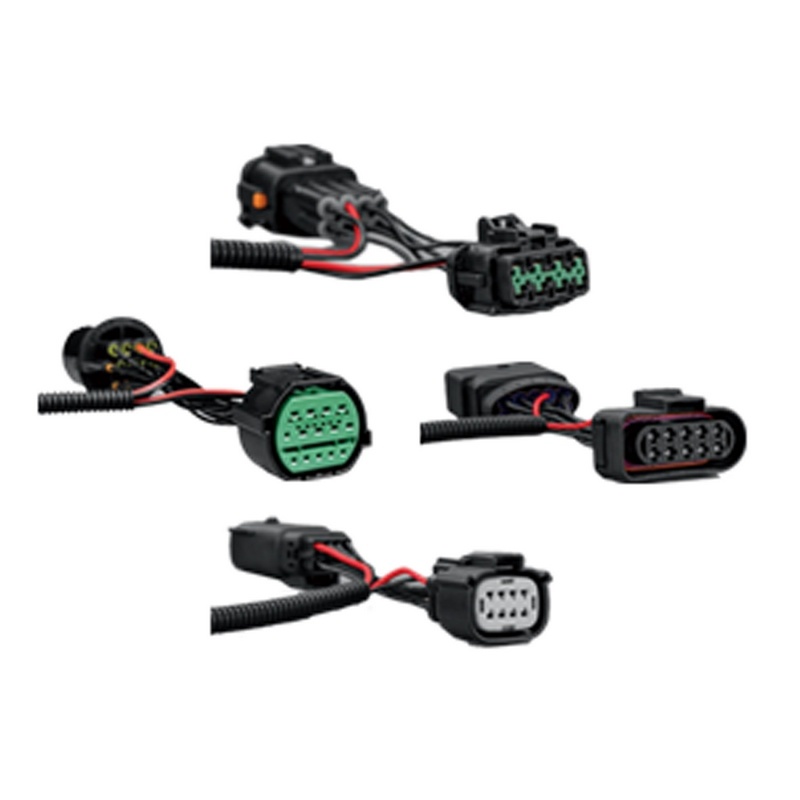
Piggyback adapters are essential tools in automotive wiring, allowing users to connect multiple wires to a single terminal without modifying the existing wiring harness. This technique is particularly useful in situations where additional circuits are needed, such as when adding aftermarket
Step-by-Step Installation Guide for Piggyback Adapters in Automotive Wiring
Understanding Piggyback Adapters
Piggyback adapters are essential tools in automotive wiring, allowing users to connect multiple wires to a single terminal without modifying the existing wiring harness. This technique is particularly useful in situations where additional circuits are needed, such as when adding aftermarket accessories, lights, or audio systems. Understanding the functionality of piggyback adapters is crucial for a successful installation.
What are Piggyback Adapters?
Piggyback adapters consist of a male and female terminal connection that allows two wires to share the same terminal pin. They come in various sizes and configurations, suitable for different automotive applications. By utilizing these adapters, you can maintain the integrity of your car's wiring harness while expanding its capabilities.
When to Use Piggyback Adapters?
There are several scenarios where piggyback adapters prove invaluable:
- **Adding Aftermarket Accessories**: Whether installing upgraded lighting or a new stereo system, piggyback adapters enable seamless integration.
- **Repairing Damaged Wiring**: If you encounter issues with existing connections, piggyback adapters can bypass damaged wires without needing to replace entire sections.
- **Modifying Electrical Systems**: For customization enthusiasts, piggyback adapters facilitate changes to the electrical system without permanent modifications.
Tools and Materials Required
Before diving into the installation process, it's essential to gather all necessary tools and materials. Here's a comprehensive list:
Essential Tools
- **Wire Stripper**: For preparing the wires by removing insulation.
- **Crimping Tool**: To secure the piggyback connectors to your wires.
- **Multimeter**: Useful for testing connections and ensuring proper voltage.
- **Heat Gun or Soldering Iron**: For heat-shrinking tubing or soldering connections if needed.
- **Electrical Tape**: To insulate and secure connections.
Materials Needed
- **Piggyback Adapters**: Choose the appropriate size and type for your application.
- **Automotive Wire**: Make sure to select the correct gauge for your project.
- **Heat Shrink Tubing**: To protect and insulate connections.
- **Fuse (if applicable)**: Ensure your new circuits are protected.
Step-by-Step Installation Process
Installation of piggyback adapters can be straightforward with the right guidance. Follow these detailed steps to ensure a successful installation.
Step 1: Safety First
Before starting the installation process, ensure your vehicle is parked in a safe, dry area. Disconnect the battery to prevent any electrical shock or short circuits. Always wear safety gear, including gloves and goggles.
Step 2: Prepare the Wires
Begin by preparing the wires you'll be working with. Use your wire stripper to remove approximately 1/4 inch of insulation from both the original wire and the new wire you intend to connect. Be careful not to damage the copper strands.
Step 3: Attach the Piggyback Adapter
1. **Insert the Original Wire**: Place the stripped end of the original wire into the designated slot of the piggyback adapter.
2. **Secure the Connection**: Use the crimping tool to firmly secure the wire within the adapter. Ensure there are no loose strands.
3. **Insert the New Wire**: Next, insert the stripped end of the new wire into the second slot of the piggyback adapter.
4. **Crimp Again**: Repeat the crimping process to secure this wire as well.
Step 4: Insulate and Secure Connections
After crimping, it’s vital to insulate your connections to prevent short circuits:
- **Heat Shrink Tubing**: If you’re using heat shrink, slide a piece over the connection before crimping, then apply heat to shrink it down for a tight seal.
- **Electrical Tape**: Alternatively, wrap electrical tape around the connection to provide insulation.
Step 5: Test the Connections
Before reassembling everything, use your multimeter to test the connections. Set it to the appropriate voltage setting and check for continuity between the wires. This step ensures that your installation is correct and functional.
Step 6: Reconnect the Battery and Test the System
Once everything is secured and insulated, reconnect the vehicle's battery. Turn on the ignition and test the new circuit. Ensure all connections are working as intended. If you added any lights or accessories, confirm they function correctly.
Troubleshooting Common Issues
Even with careful installation, issues can arise. Here are common problems and how to address them:
Connection Failures
If your new accessory isn't working, double-check your connections. Ensure all wires are securely crimped and properly insulated.
Intermittent Power Supply
If the power supply fluctuates, inspect for loose connections or damaged wires. A multimeter can help pinpoint the issue.
Fuse Issues
If a fuse blows after installation, verify that the new circuit doesn't exceed the amperage rating of the fuse. Consider using a fuse with a higher rating if necessary, but always ensure it’s within safe limits.
Frequently Asked Questions (FAQs)
1. Can I use piggyback adapters with all types of vehicles?
Yes, piggyback adapters are versatile and can be used with a majority of vehicles, but ensure that the specific type matches your car's wiring system.
2. What gauge wire should I use for piggyback adapters?
The gauge of the wire depends on the application. For most automotive applications, 16 to 18 gauge wire is sufficient, but always refer to the manufacturer’s specifications for exact requirements.
3. Are piggyback adapters weatherproof?
While many piggyback adapters are designed for automotive use, it's crucial to choose weather-resistant options if installed in exposed areas. Ensure proper insulation to protect against moisture.
4. Do I need a fuse for circuits connected with piggyback adapters?
Yes, it’s highly recommended to include a fuse on any new circuits to prevent overload and protect your vehicle's electrical system.
5. Can I remove piggyback adapters easily?
Yes, piggyback adapters can be removed without permanent alterations to the wiring harness. Simply disconnect the wires and remove the adapter.
Conclusion
Installing piggyback adapters in automotive wiring is a practical solution for enhancing your vehicle’s electrical system. By following this detailed step-by-step guide, you can ensure a seamless installation that meets your needs while maintaining the integrity of your wiring. Remember to always prioritize safety, double-check your connections, and enjoy the added functionality that piggyback adapters provide. With the right tools and knowledge, you’ll confidently tackle any wiring project, making your automotive experience even more enjoyable.
Latest News

Welcome to Our Factory: Schedule Your Visit During the Canton Fair!
Schedule Your Visit Ahead of Time
To ensure we can provide you with a dedicated tour and personalized service, we recommend booking your visit in advance.

Essential Guide to Remote Control Wiring Harness for Off-Road Vehicles
When it comes to customizing off-road vehicles, one of the essential components is the remote control wiring harness. This specialized harness is designed to handle the unique demands of off-road environments, where durability and reliability are paramount. Understanding its construction, functionality, and installation can significantly enhance your vehicle's capability and ease of use.
A remote

ONLINE CONSULTATION
中企跨境-全域组件
制作前进入CSS配置样式
Get Quote:
WhatsApp:
E-mail:
Hotline::
在线客服添加返回顶部
右侧在线客服样式 1,2,3 1
图片alt标题设置: Chentong
表单验证提示文本: Content cannot be empty!
循环体没有内容时: Sorry,no matching items were found.
CSS / JS 文件放置地